
The Latest Thymio Firmware is V10 (as of June 2016)
1) Download V10 firmware update (firmware will improve sensor readings, add Thymio interactivity, and allow volume control)
- Check the release notes for V10
- Check to see if there is a more recent firmware update
2) Watch instructional video and follow along
- Make sure Thymio has at least 2 battery bars before updating
- Open “Thymio Firmware Upgrader” Program
- Click on “Select…” then choose the file “Thymio2-Vx.hex” that you downloaded or unzipped.
- Warning, do not use any other .hex files not designed for Thymio II!
- This could permanently damage your robot.
- Press “Update” and check that the process has reached 100%.
- Do not disconnect Thymio II during this phase. This could permanently damage your robot.
- For further information, go to: https://aseba.wikidot.com/en:thymioupdate
Congratulations, your Thymio II has been upgraded!
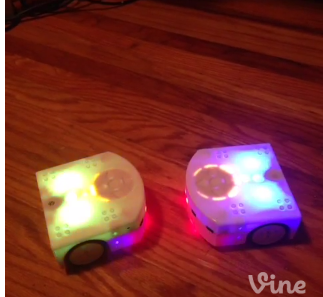
3) To get two Thymios to interact, put Thymio’s in preprogrammed green mode and then put them infront of one of another.
We suggest that you take the 2 minutes to update your robot to improve your experience!
4) Firmware Version 9 allows you to change Volume and Motor Calibration of Thymio
Version 9 and higher of the firmware (learn more about the firmware here) allow you to change the basic settings of your Thymio without having to connect it to a computer. In the behaviour-selection menu, simultaneously touch the left and right buttons for 3 seconds (see picture) to enter the settings menu.
Then choose the setting you want to adjust.

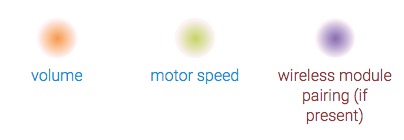

In this setting mode, you can choose the volume of the Thymio by touching the “front” or the “back” button. You see the actual volume on the yellow led circle. To save your choice and exit the setting mode, just power off the Thymio by touching 3 seconds the central button.


In this setting mode, you can calibrate the speed of the motors. Indeed, because no two motors are exactly the same, the same power level may result in different speeds. This page provides a procedure to calibrate the motors on your robot so that it will travel straight.
The calibration is supported starting from firmware V.9 in the setting mode. If you have an earlier version,upgrade the firmware of your robot.
Print this pdf file and tape it to a table or to the ground. (print the file on two A4 pages at 100 % and tape them together; alternatively, print on a single A3 page.) Place the robot between the lines and run the pre-programmed obedient (purple) behaviour, which enables you to control the forward speed of the robot. If the robot remains between the lines for 40 cm, calibration is not needed; otherwise, carry out the following procedure:
- Choose the light green mode in the setting mode menu.
- The “front” and “back” buttons make the robot move forward and backward. Press them once or twice to modify its speed, so that you can check if the robot travels straight at different speeds.
- The “left” and “right” buttons increase or decrease the correction in the direction of travel: If the robot turns right, touch the left button to correct the direction until it goes straight, and conversely if it turns left, touch the right button.
- When the robot goes straight, touch the central button. This will stop the motors and record the correction value into the robot.
- Power off the robot.
- Power on the robot again and check the results of the calibration by running the pre-programmed obedient (purple) behaviour.
Here is a video showing a calibration example: